
Introduction
AI is something that every person relies on in the technology field. It has now become a crucial part of the development workflow. Now Developers can rely on AI-powered tools to make their work easier, instead of spending a lot of time finding answers through documentation or browsing forums, developers can just write the requirement and AI-powered tools will generate code, troubleshoot errors, can identify bugs and suggest improvements in real time. This makes development a lot easier because it reduces coding work that developers have to do.
Cursor is one of the most popular AI-Powered code editor available today. Cursor is a version of Visual Studio Code (VS Code). It looks and feels the same when you use both of them. The combination of a code editor with advanced AI capabilities makes Cursor more flexible. Developers can use simple prompts to generate code, improve the existing code, adds additional features if required via prompts, understands complex files and solve errors without leaving the editor. Cursor has an interface like VS Code which makes it easier for users who use it often.
Cursor is now becoming the preferred code editor. Many developers are now using cursor as their primary development environment. It has the ability to understand your project, suggest code improvements and helps with both frontend and backend development which makes coding much easier and efficient. Whether you’re creating a simple website using HTML, CSS, Javascript or developing a full-stack web application, while maintaining code quality cursor can reduce development time.
This blog is about using Cursor for web development. It will show you the complete setup process, explain key features and how to use Cursor to build modern websites.
What is Cursor AI?
Cursor AI is an AI-Powered code editor that helps developers to edit, write and manage code efficiently. It is easy for VS Code users to get started, since it shares the same open-source foundation as Visual Studio Code and, so it feels similar to anyone who has used VS code before.
Cursor is not a normal code editor, it’s more than that. It has built-in AI which makes the development process easier. Usually we search on the internet for solutions but with cursor you can just simply describe your requirements in plain english. Cursor then understands your requirements and generates code accordingly, it also explains existing code, fix errors, and suggests improvements.
Cursor supports multiple AI-models, which makes it easier for developers to choose the model that fits best for their workflow and coding requirements.
It supports models such as:
1. OpenAI – GPT models
2. Anthropic – Claude models
3. Google – Gemini models
4. DeepSeek – DeepSeek models
5. xAI – Grok models
6. Cursor – Cursor’s own AI models
It understands what the requirement is or the project is about and gives accurate or relevant suggestions, which makes the development process faster. Developers can easily switch between models depending on the task whether its writing code, debugging, editing existing code.
Some of the key features of Cursor include:
1. AI Chat – Ask coding related questions and get answers instantly within the editor.
2. Code Generation – By describing your requirements it can create HTML, CSS, Javascript, PHP and other code.
3. Debugging – Receive suggestions and identify errors and fix them quickly.
4. Refactoring – Improves the structure of existing code, which makes it more readable and easier to maintain.
5. AI-Powered Autocomplete – Get code suggestions as you type.
6. Terminal Assistance – Get help in fixing command line errors and terminal errors.
With these features Cursor helps developers build websites and web applications faster while maintaining clean code.
System Requirements
Before installing or using cursor, your system has to meet a few basic requirements. Cursor works with Windows, macOS and Linux making it accessible for developers across different operating systems. You can complete the installation in a few minutes by downloading the version that matches your device.
To get started with Cursor you will need:
1. Operating systems – Windows, macOS and Linux
2. Cursor Account – To Sign in and access AI features.
3. Basic understanding of web development – Knowledge of HTML, CSS and Javascript is recommended to understand and use most of its features.
Step by Step guide on how to setup cursor for web-developement
Step1 – Download Cursor
1. Visit the official cursor website – https://cursor.com/
2. When you visit the website cursor automatically detects your operating system and based on that it displays a download option.
3. Follow the instructions once download is completed.
For Windows
1. Find the downloaded .exe file in your downloads folder.
2. Open the file to start the setup wizard.
3. Click yes to allow installation if User Account Control prompt appears.
4. Follow the instructions and wait for the installation to be completed.
5. Once the installation is complete, click finish to launch Cursor or by using desktop shortcut, start menu or terminal.
How to Launch Cursor in Windows
1. Desktop Shortcut – During installation if you left the Create desktop shortcut checked, you can double click on the Cursor icon on your desktop.
2. Start menu – Press Windows key on your keyboard and search for Cursor, and click the application to open it.
For macOS
1.From your downloads folder open .dmg file.
2. Next drag the Cursor icon into the Applications folder
3. Open Finder, search for Cursor and launch it.
4. Click open if it shows a security warning to confirm an app downloaded from the internet.
How to Launch Cursor in Mac
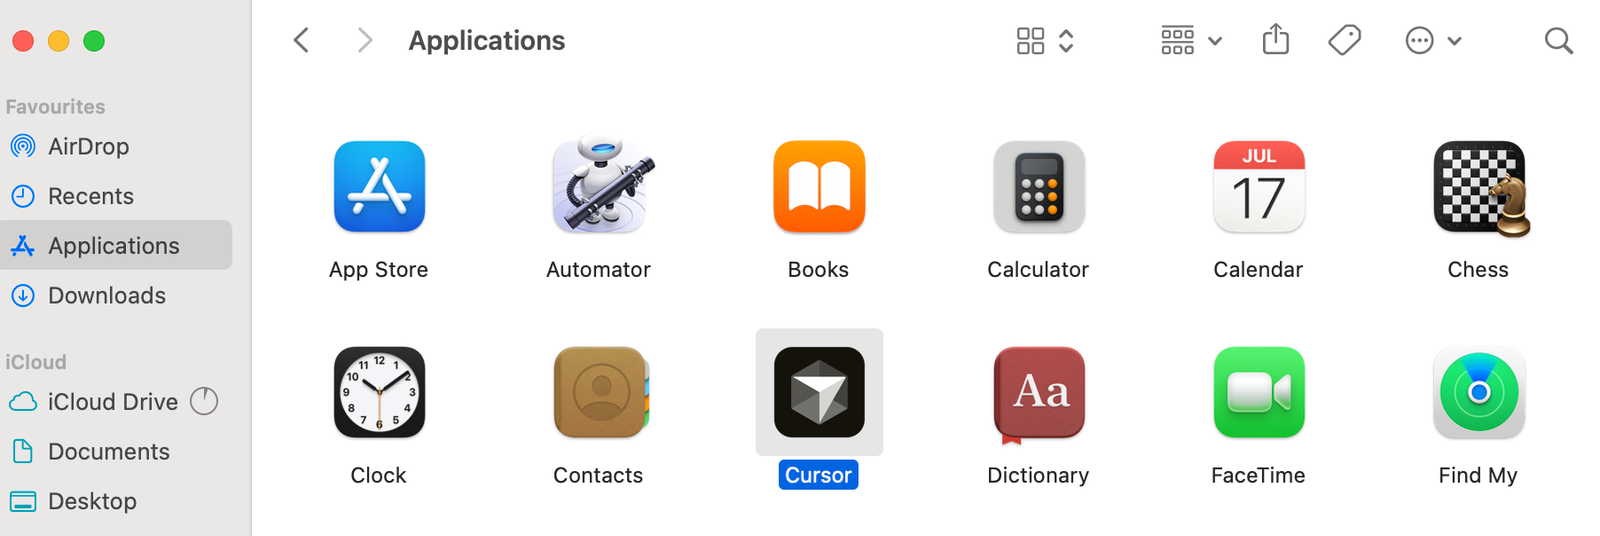
1. Open Finder and in the Application folder double-click Cursor.
2. For Spotlight search press Cmd + Space type Cursor and click on return button.
3. Click on Launchpad find for Cursor and click on it.
Figure1: Cursor Download Page
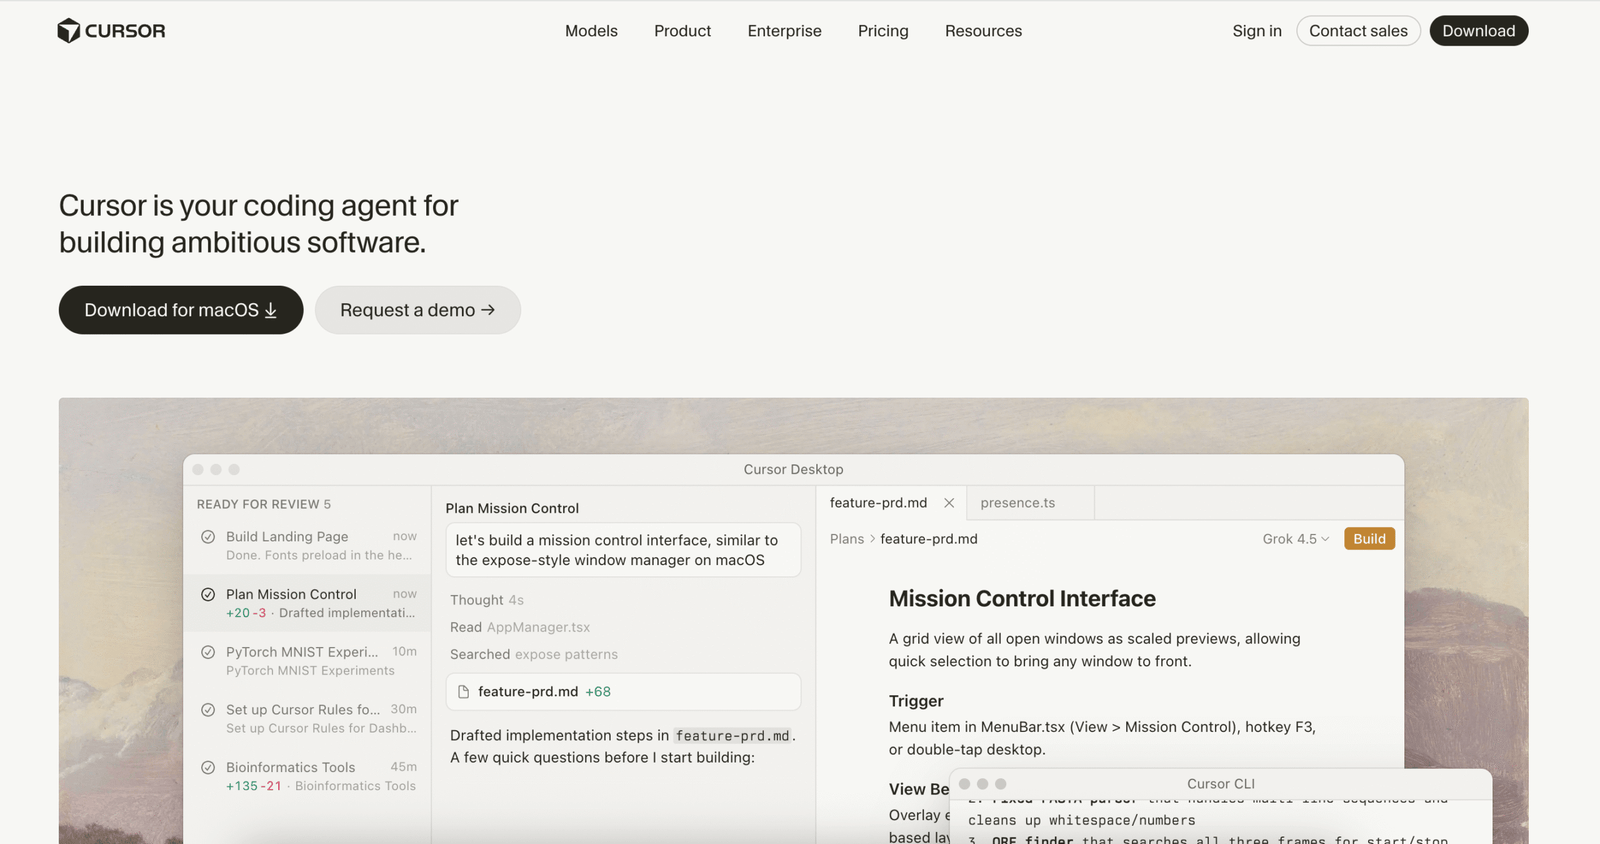
Figure2: Cursor DMG File in Downloads
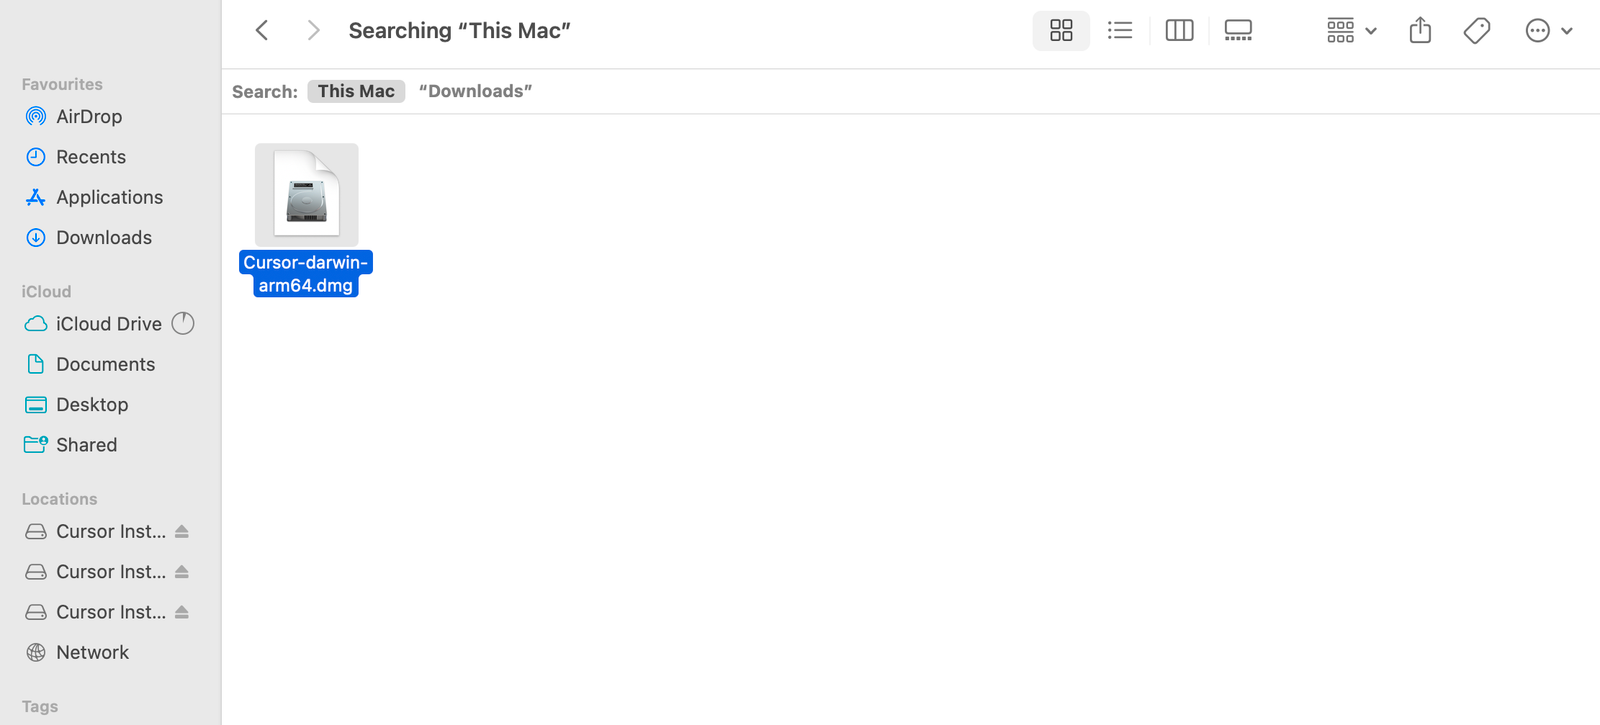
Figure3: Cursor Installation Window
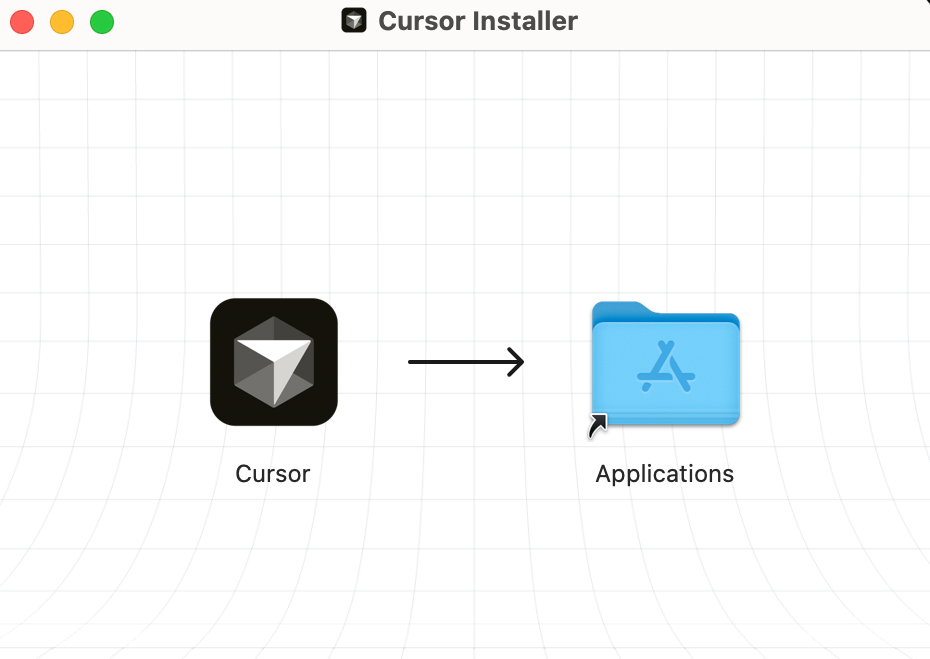
Figure4: Cursor Application in macOS Applications Folder
Step2: Sign In and select a plan
1. Create or sign in to your cursor account:
Note : If you already have a cursor account select sign in and follow instructions, if you’re new to Cursor create an account and complete the process.
2. Select a Plan
Hobby (Free) – Includes access to composer, no credit card required, limit agent requests
Individual (Pro) – Everything in hobby plus it includes extended limits on agents, generous limits for Grok & Composer, Access to frontier models, Cloud agents, budget on usage-based billing.
Individual (Pro+) – Includes everything in pro, plus 3times pro limits on agent.
Individual (Ultra) – Everything in Pro, plus 20x Pro limits on agent, Priority access ti new features.
Teams (Standard) – Everything on individual, plus designed for teams and includes centralized billing, team administration, shared context, and other collaboration features.
Teams (Premium) – Everything on individual and teams standard, plus 5x standard limits on agent.
Enterprise – Everything on teams, plus pooled usage, Invoice/PO billing, SCIM seat management, repository, model, and MCP access controls, Auto-run, browser, and network controls, audit logs and service accounts, AI code tracking API, Priority support and account management.
Step3 – Understanding Cursor AI interface
Once you open Cursor, you will find an interface similar to VS Code.
Figure 5: Cursor AI interface for web development
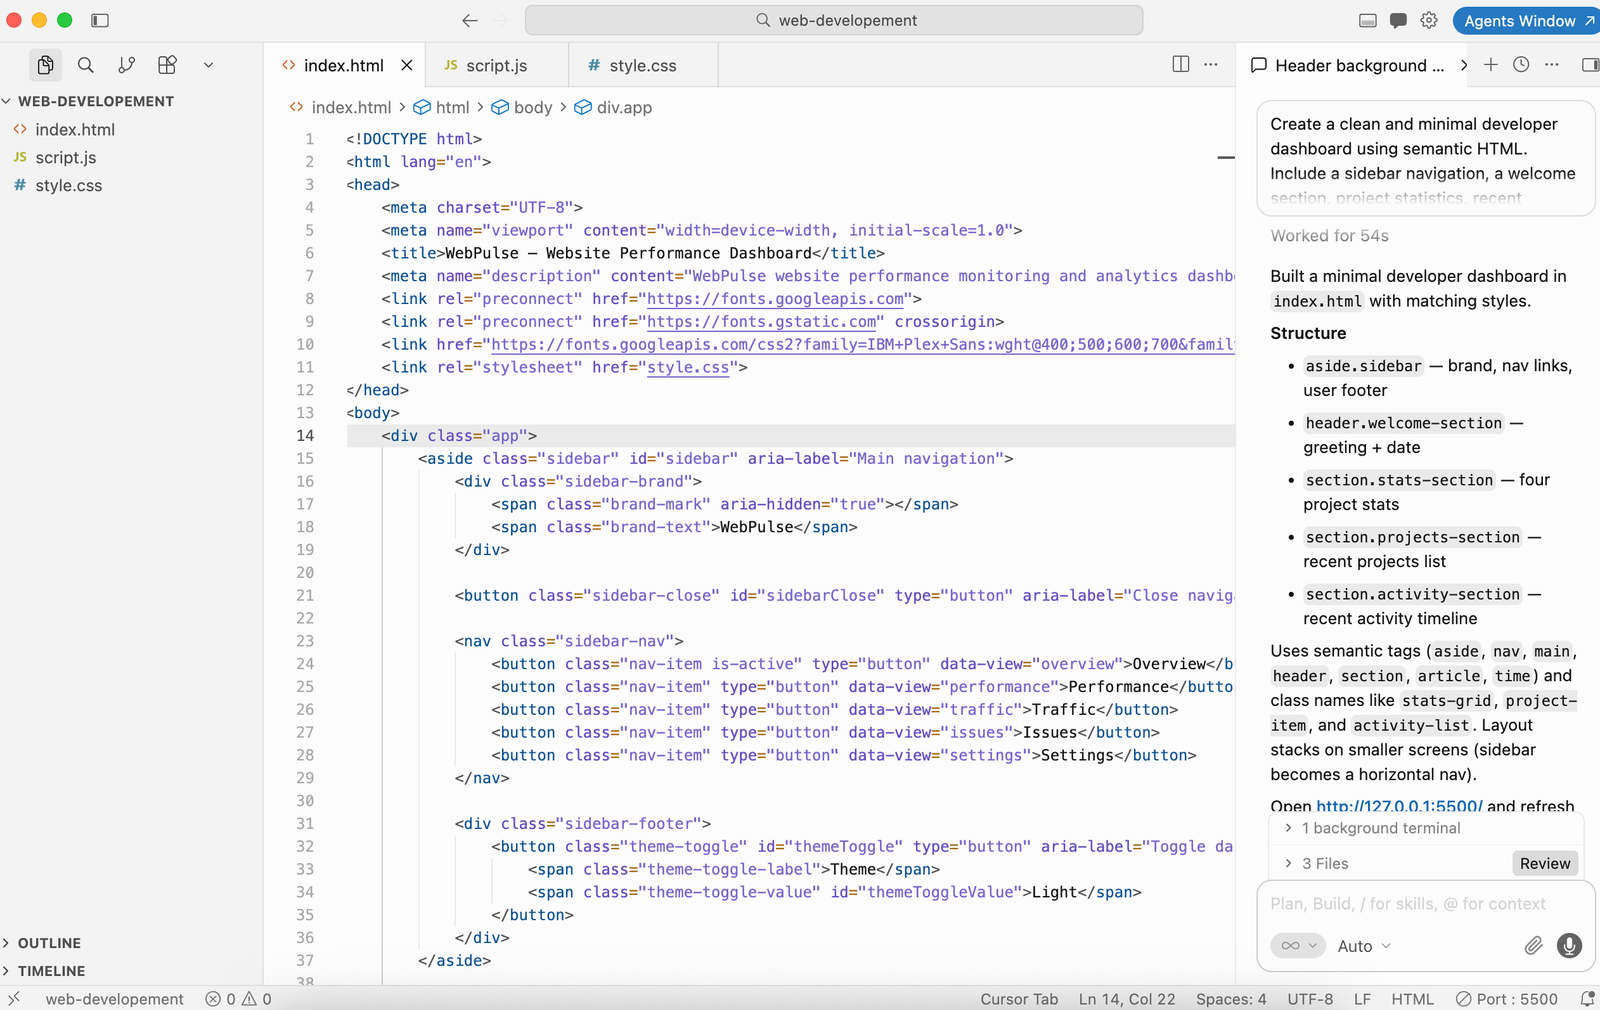
Explorer: It displays your project files and folder.
Editor: Code editor is the main area of your cursor where you can edit and write your code.
AI Chat: You can interact with the cursor’s AI chat by sending prompts. It will identify error, suggest improvements, edits code.
Terminal: It allows you to run commands, install packages and start development servers.
Extensions: Install tools that improve your web development workflow.
AI Autocomplete: Get code suggestions as you type.
Step4 – Create or Open a Project
Create a new folder in your computer, you can create a folder named my-website for example. After creating a folder open cursor and then open a project this will open your files directly and select your project folder created. For existing project select open project on cursor and select the existing project folder created.
Step5: Start building a website with Cursor
Once the project is selected, instead of writing code manually you can start using its AI features to build your website. You can describe your requirements related to your website in a prompt and the Cursor will generate the code.
For example, we will build a Website Performance Dashboard called “WebPulse” using Cursor.
Create a professional and responsive Website Performance Dashboard called “WebPulse” using HTML, CSS, and vanilla JavaScript. Create separate files for HTML, CSS, and JavaScript. Include a sidebar navigation, top header, performance statistics cards, a performance analytics chart, Core Web Vitals, traffic sources, and a recent performance issues section. Add search and filtering functionality, a light/dark mode toggle, and make the dashboard responsive for desktop, tablet, and mobile devices. Use realistic sample data and do not connect to any external APIs. Keep the design clean, modern, and professional.
Cursor will analyze the prompt and generate the required code for the project.
Figure6: WebPulse website performance dashboard generated and previewed inside Cursor.
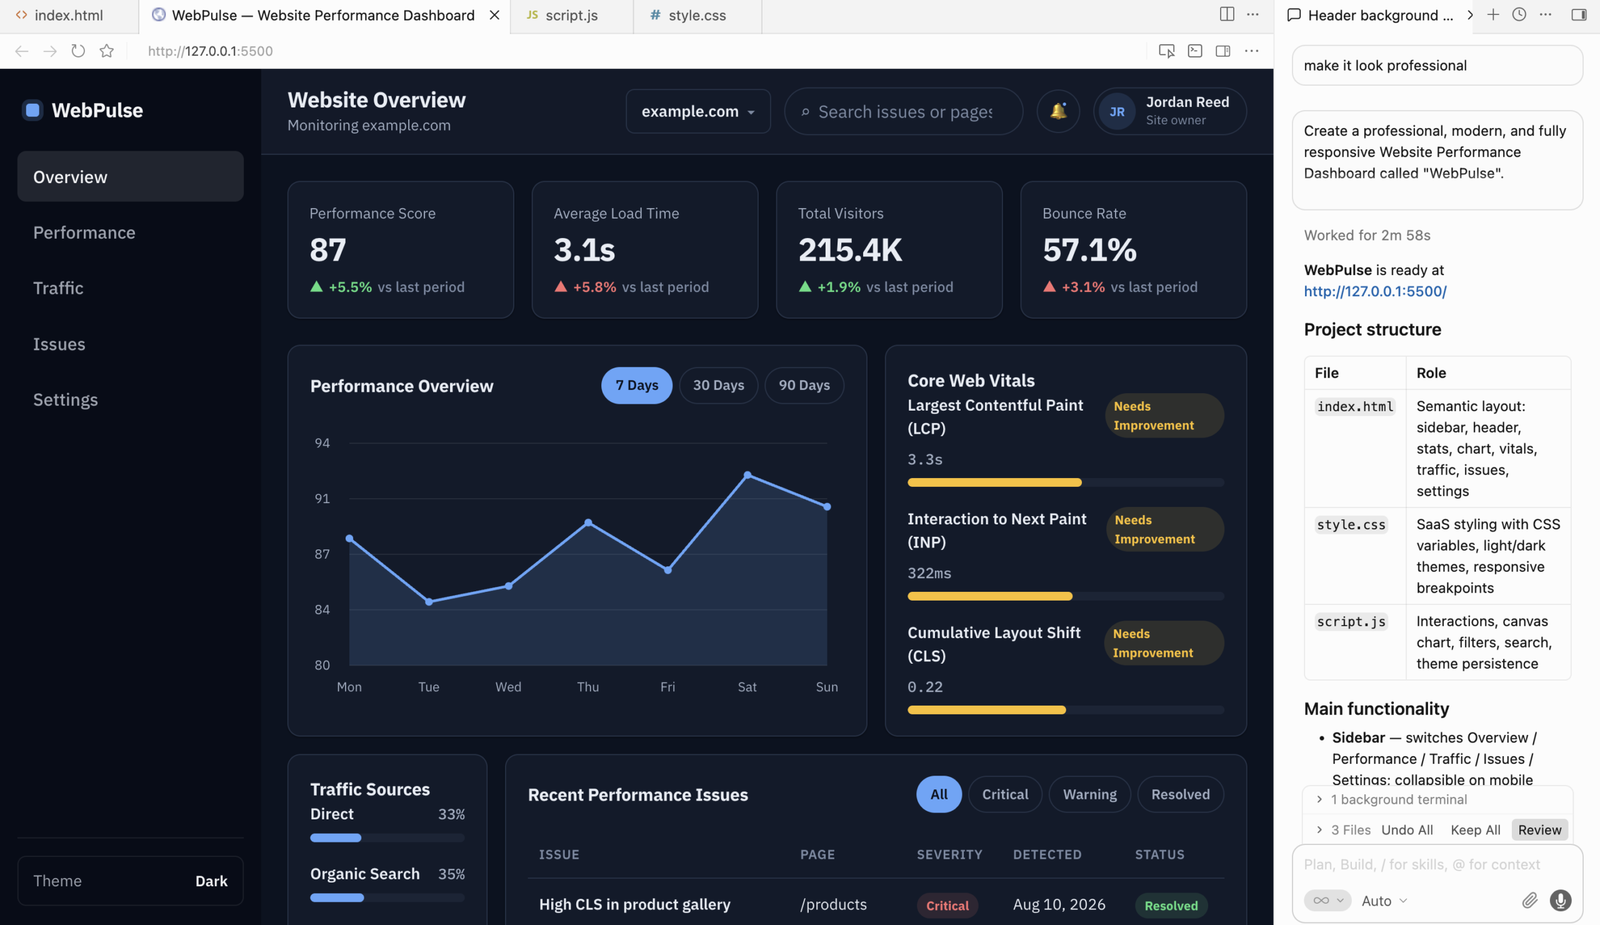
Note – The dashboard uses sample data for demonstration and is not connected to a real performance API.
Step6 – Review and Customize Generated Code
Cursor can improve existing sections of the project as per your requirements, you can describe your changes and cursor will find the relevant code and update it.
For example, to improve the performance statistic cards, give Cursor the following prompt:
Redesign the four performance statistic cards. Make them larger, add a small icon to each card, increase the main metric value size, add a visible percentage change indicator, and add a subtle hover animation when the user moves the mouse over a card. Keep the existing data unchanged.
After the changes are completed, review them. You can keep to accept the changes or undo to reject them.
Cursor can be used to edit existing code through a prompt, making it easier to improve a website without manually editing every part of the code.
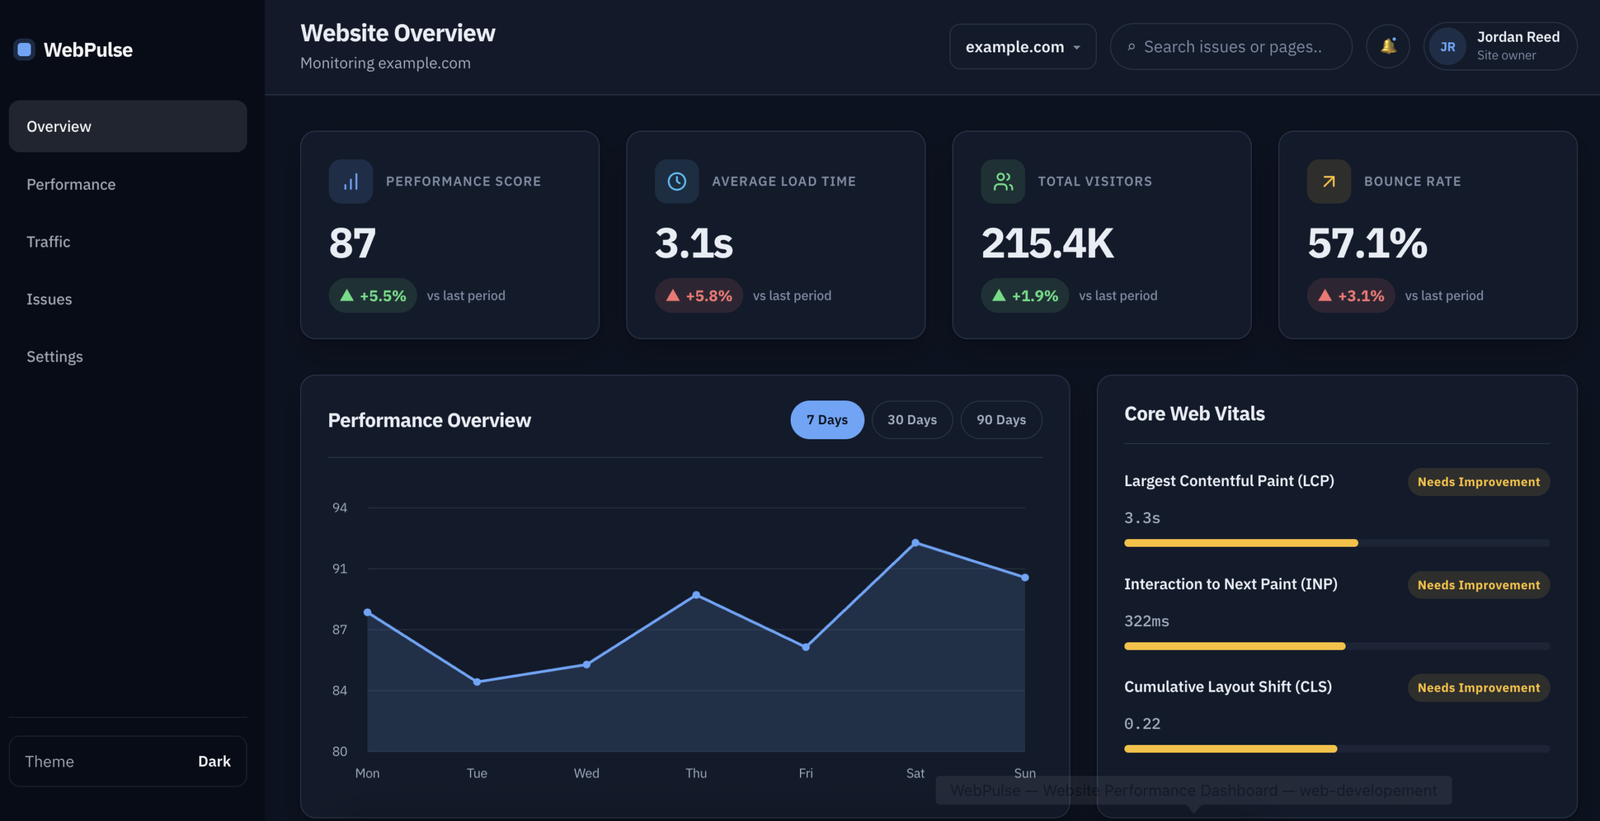
Step 7: Debug and Fix Errors Using Cursor
You may encounter errors during development when adding or modifying any features. Cursor can analyze the project files and suggest improvements and help identify the cause of an issue.
For example, you can ask:
The dark mode toggle is not working. Check the HTML, CSS, and JavaScript, identify the issue, and fix it without changing the existing design.
Cursor will identify the problem and suggest the required changes. Always test the fix in the browser after applying it to make sure the feature works correctly.
Step 8: Test and Refine the Website
After making changes and fixing errors, test the website in the browser to make sure everything works as expected. Use Live Server to open the WebPulse dashboard and check its layout and functionality on different screen sizes.
Test important features such as:
- Navigation and buttons
- Search and filters
- Dark mode
- Performance chart
- Responsive layout
- Interactive elements
You can also ask Cursor to review the project:
Review the entire project for HTML, CSS, and JavaScript issues, responsiveness, accessibility, and code quality. List any problems you find without making changes.
Conclusion
Cursor makes web development easier by bringing AI assistance directly into the code editor. From setting up a project and generating code to modifying features, fixing errors, and improving existing code, developers can use Cursor throughout the development process.
As demonstrated with the WebPulse project, Cursor can help build websites using simple natural-language prompts while allowing developers to review and control the changes.
With a good understanding of HTML, CSS, and JavaScript, Cursor can become a useful tool for building and improving websites more efficiently while reducing repetitive coding work.

Ready to scope your next initiative?
Share your goals with our Bangalore team. We respond within one business day with a clear path from discovery to delivery.